Gratis quiltpatronen
Op deze pagina`s staan honderden gratis blokken van de maand. Elk blok van de maand past in een groter geheel. Bij elke serie blokken staat hoe u de blokken in een quilt kunt verwerken. U kunt natuurlijk ook maar één blok van de maand verwerken tot een kleine quilt. Kijk ook eens bij de 1000+ patronen van het onderdeel Quiltontwerp kiezen.
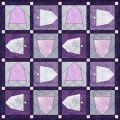
Patchwork pattern: Dubbelzijdig Log Cabin 12
Back to survey of blocks of 2014
The block of the month (December 2014) is a foundation pattern, but you can also sew it the traditional way. When making a double sided Log Cabin, take a 17 x 17 cm piece of fiberfill.
How to sew:
- Draw the pattern A and V (also see attached pdf document) at Freezer Paper (FP)
- Draw each arrow (pointing at the middle of a piece) but don’t draw any dotted line (lay-on line)
- Write in each pattern-piece the Capital and number.
- Draw the A-pattern on Teabag Paper (TB) but don’t write the capitals.
- This time you have to draw each dotted line and also the arrows.
- Draw an extra line around the block for a 1 cm seam allowance.
- Cut a piece of 17 x 17 cm thin fiberfill.
- Iron each FP piece at the back side of the correct fabrics.
- Cut all pieces fabric with a 7mm seam allowance. Cut a right piece (V) and a reverse piece (A)! (the backside is mirrored)
- Put the TB on top of the fiberfill.
- Put on top of the TB piece number V1, right side up. Put V2 on top of that and pin the pieces in place. Use the arrows and dotted line to put them in the right place. Put the pins in the corners of the pattern line (the one that will be sewn).
- Put the pins straight down, so they will show the correct points at the back side.
- Turn the whole piece upside down and put A1 and A2 at the same place on the backside. The arrow points to the right side of the piece and will show where the piece must be pinned. (At the backside, the pieces are mirrored) When the pieces are correctly placed, take away the FP at both sides.
- Pin together all the layers and sew 7mm next to the outside between A1 and A2 .
- Fold open both pieces A2 (front and back side)
- Put V3 on top of V1/2, the arrow will point to the correct side and the dotted line will show how far you must put it. Pin at the corners of the FP-pattern piece.
- Turn your work upside down and put A3 on top of the pins. The arrow will show which side.
- Take away the FP and pin all layers together.
- Sew next to the outside of the V3 pieces and fold open.
- Do this with all the pieces.
- Sew the blocks together as ‘Quilt as you go’-blocks
To download:
 blok 12 2014 (*.pdf) In this file you find a pattern and a short description.
 |
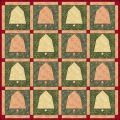
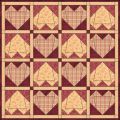
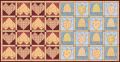
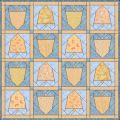
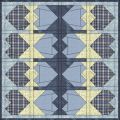
Examples
Click at a picture for a bigger example.
 |  |  |  |  |
 |  |  |  |  |
 |  |